UI Builder Basics
Overview
UI Builder is Balancy's visual editor for creating custom user interfaces. It combines HTML, CSS, and JavaScript in a designer-friendly interface with real-time preview.
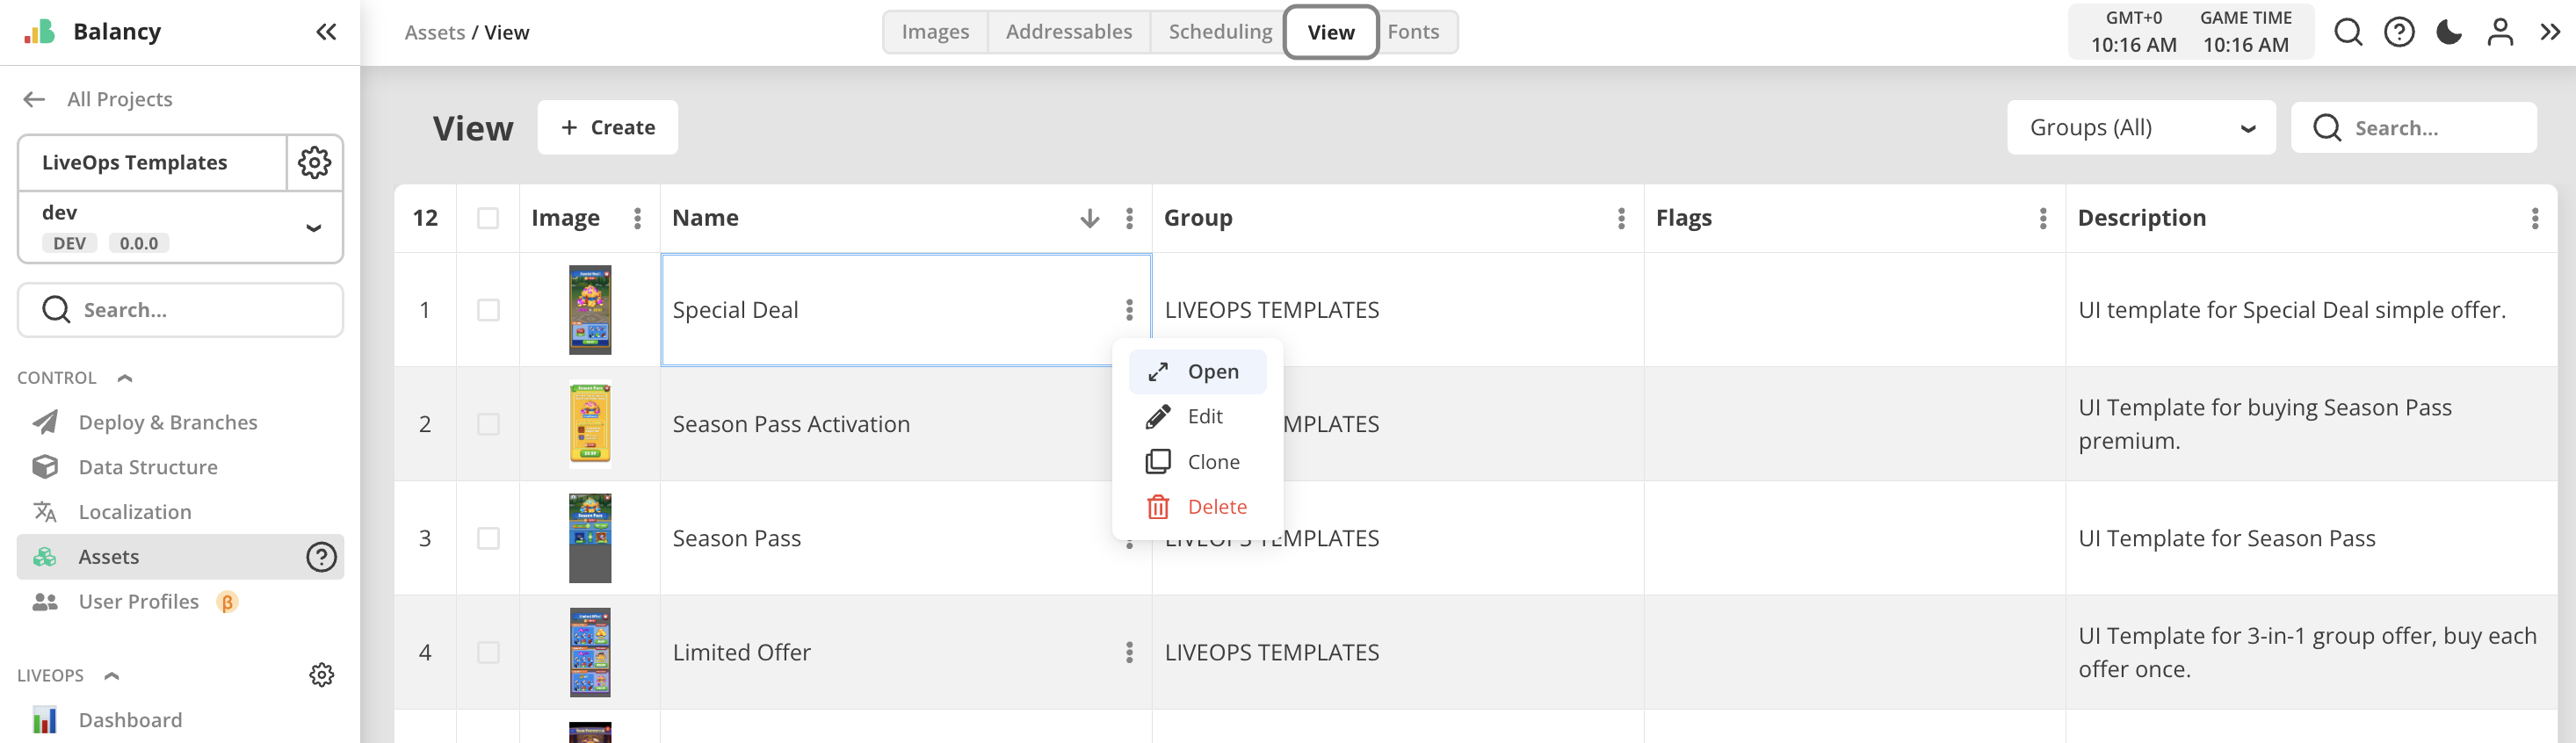
Opening UI Builder
- Go to Assets page
- Select View tab
- Find your view or click Create for a new one
- Click Open in the context menu
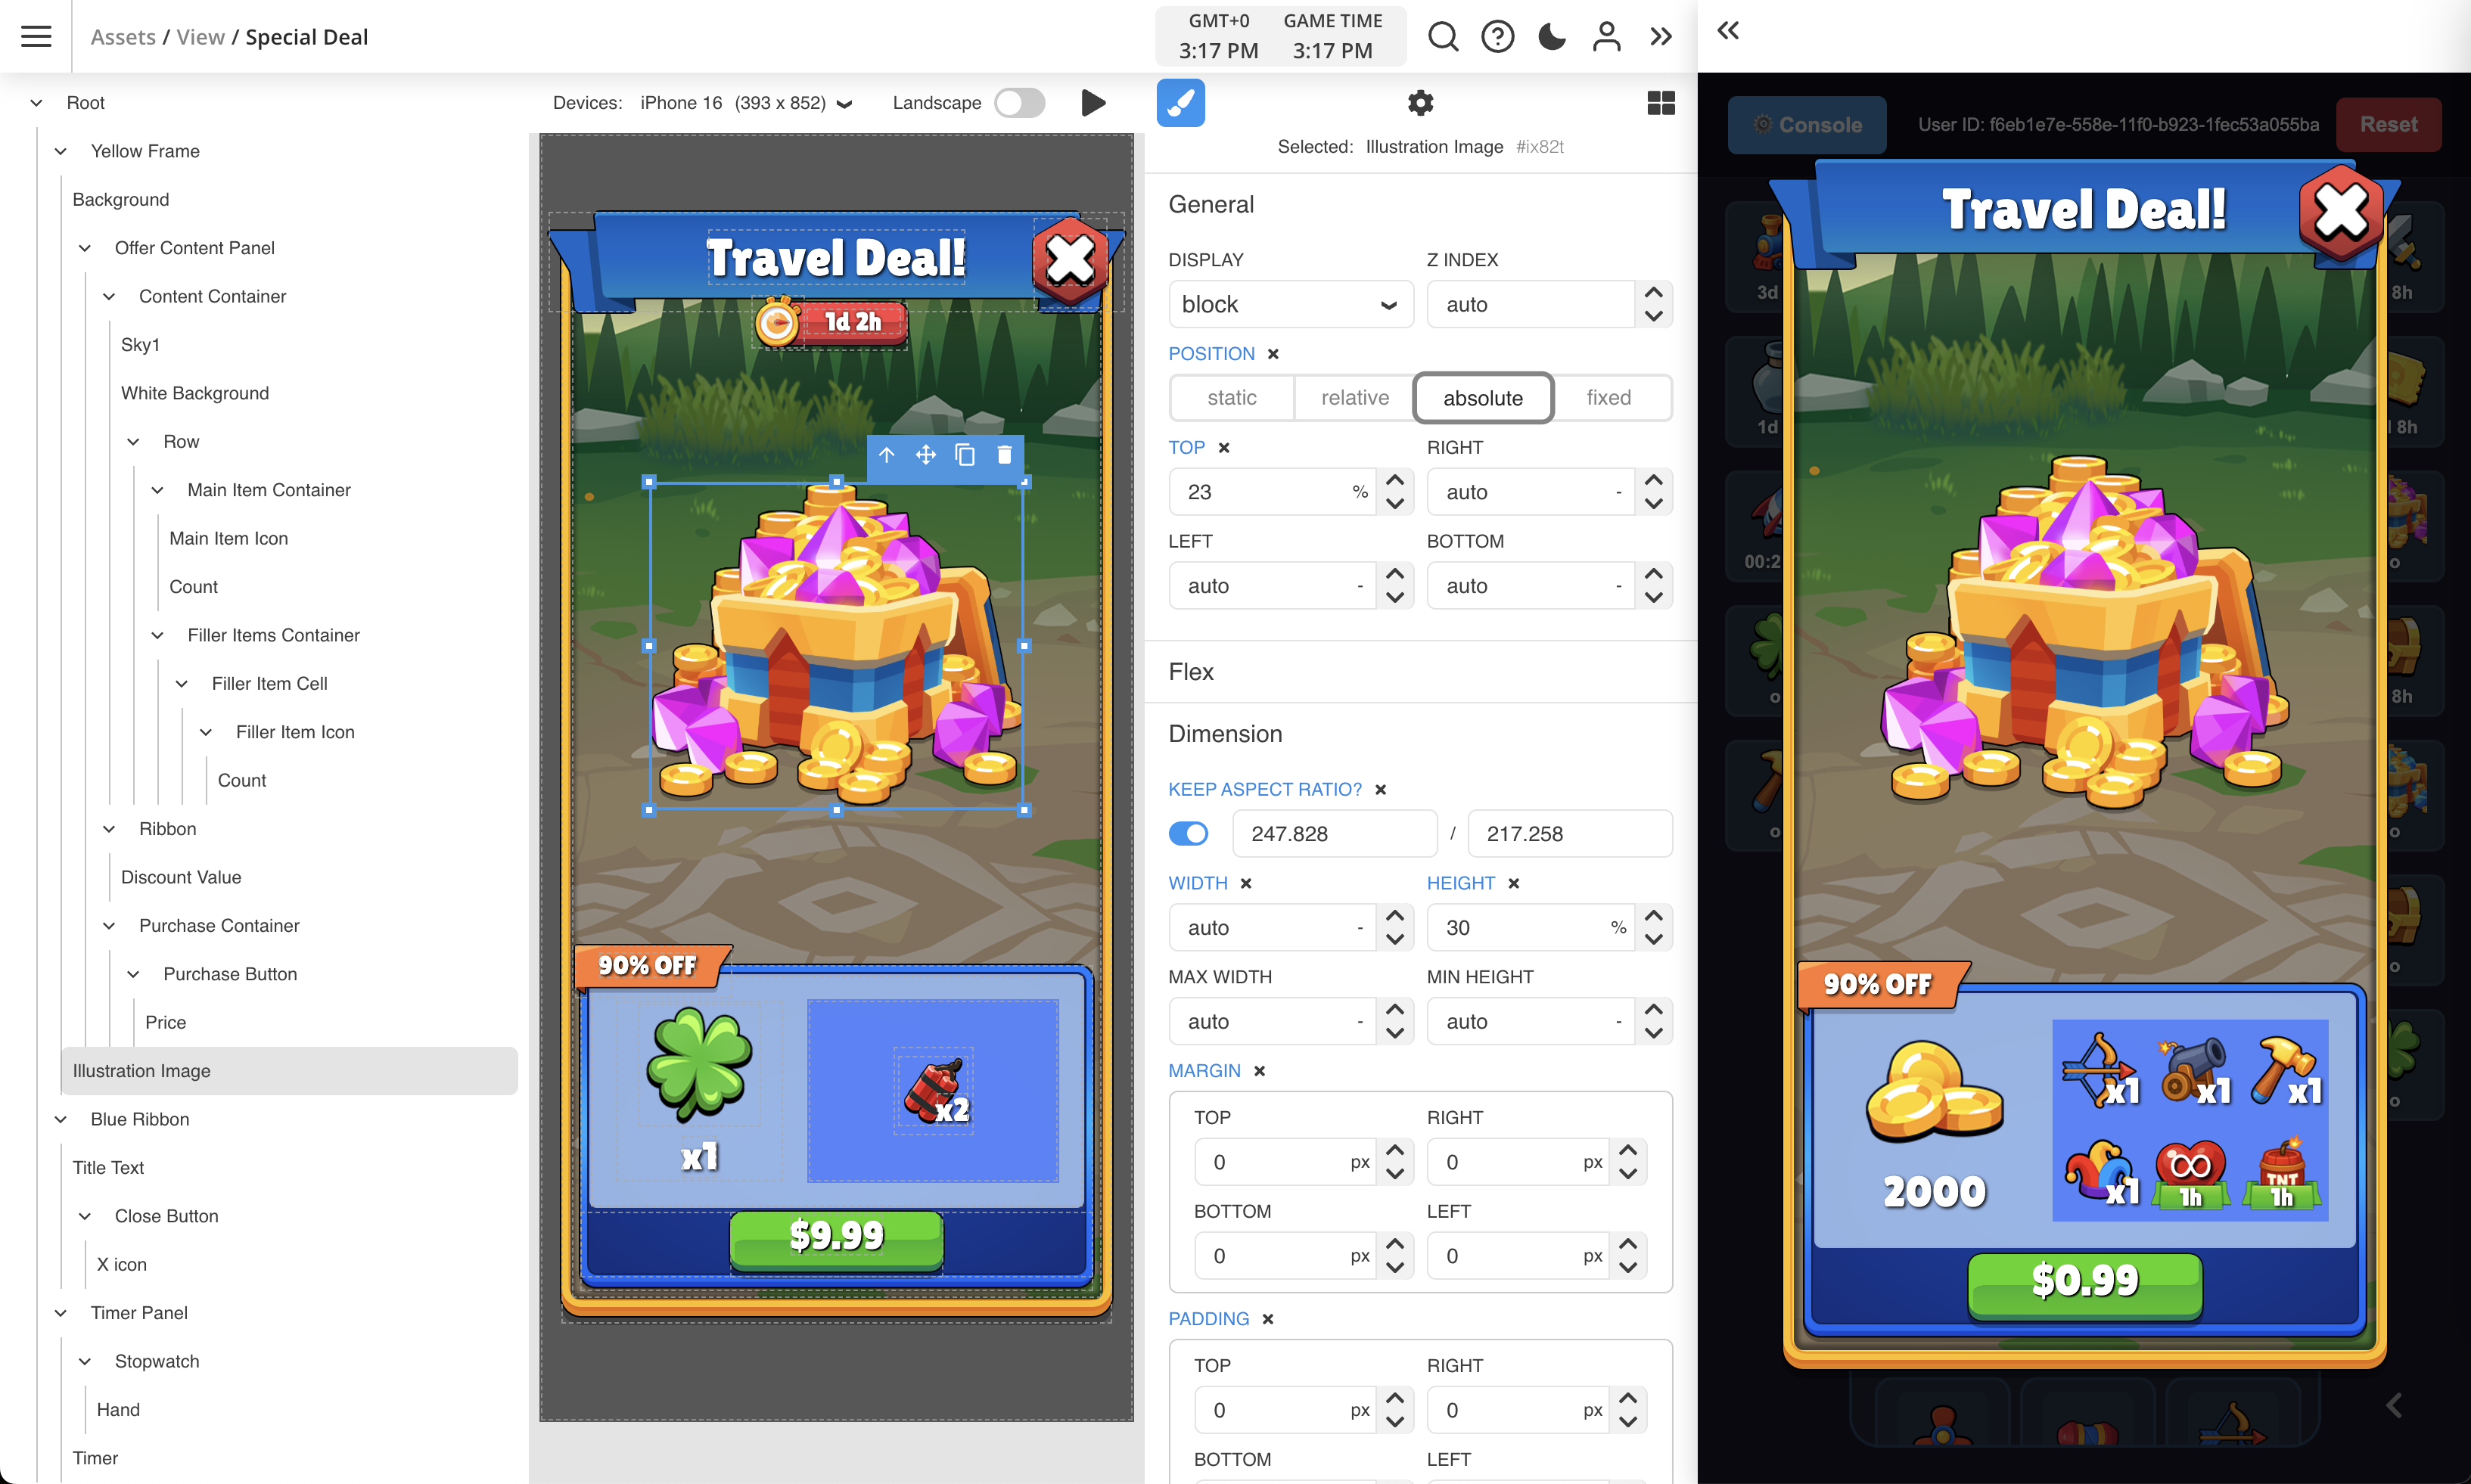
Interface Layout
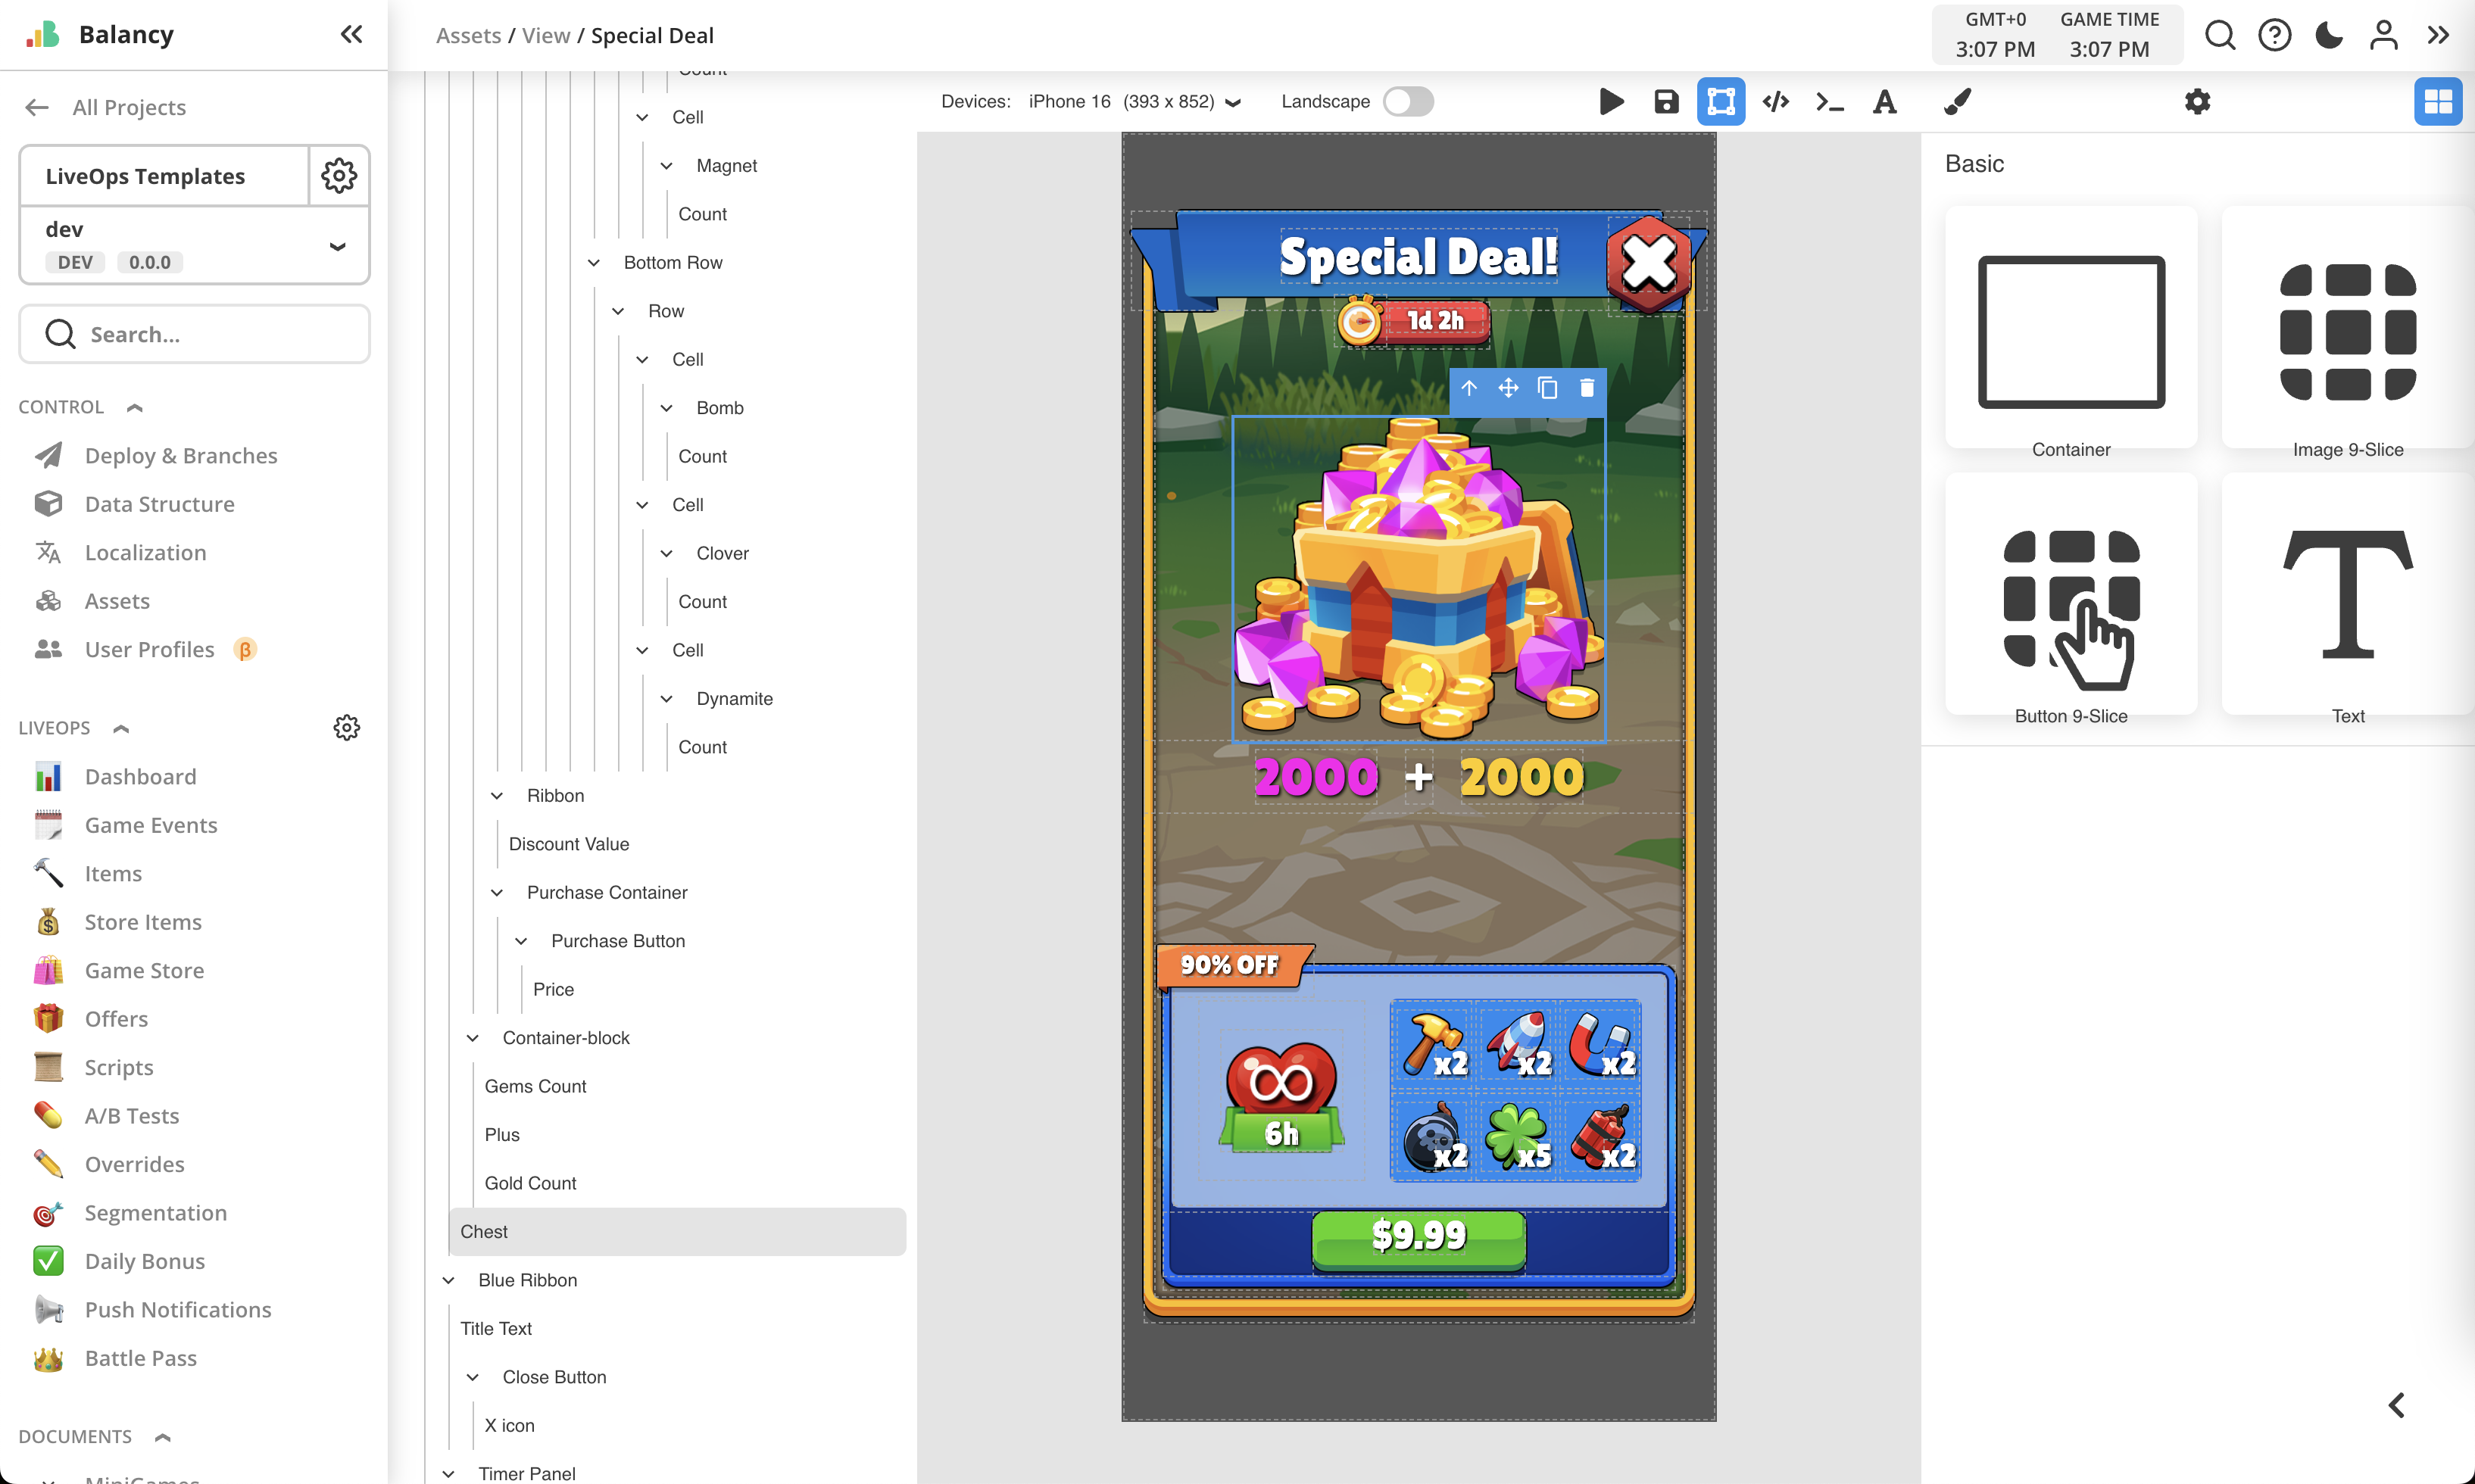
The UI Builder has four main areas:
- Canvas (center): Main working area showing your view's layout
- Tools Panel (right): Elements, styling, and settings
- Hierarchy (left): Tree view of all elements
- Top Panel: Device selector, preview, save, and editor controls
What is a View?
A View is a Balancy asset that combines: - HTML: Structure and content - CSS: Visual styling - JavaScript: Interactive behavior
Views are displayed in WebView containers controlled by the Balancy SDK, making them work seamlessly across platforms (web, mobile, desktop).
Tools Panel
The tools panel has three tabs:
Elements Tab
Drag-and-drop building blocks:
- Containers: Layout containers (flex, grid, etc.)
- Images: Static images from Balancy resources
- Regular images
- 9-slice images (scalable UI elements)
- Texts: Text elements
- Static text
- Localized text (from Localization system)
- Dynamic text (data-driven)
- Buttons: Interactive 9-slice buttons with actions
- Scripts: Attach script components (new!)
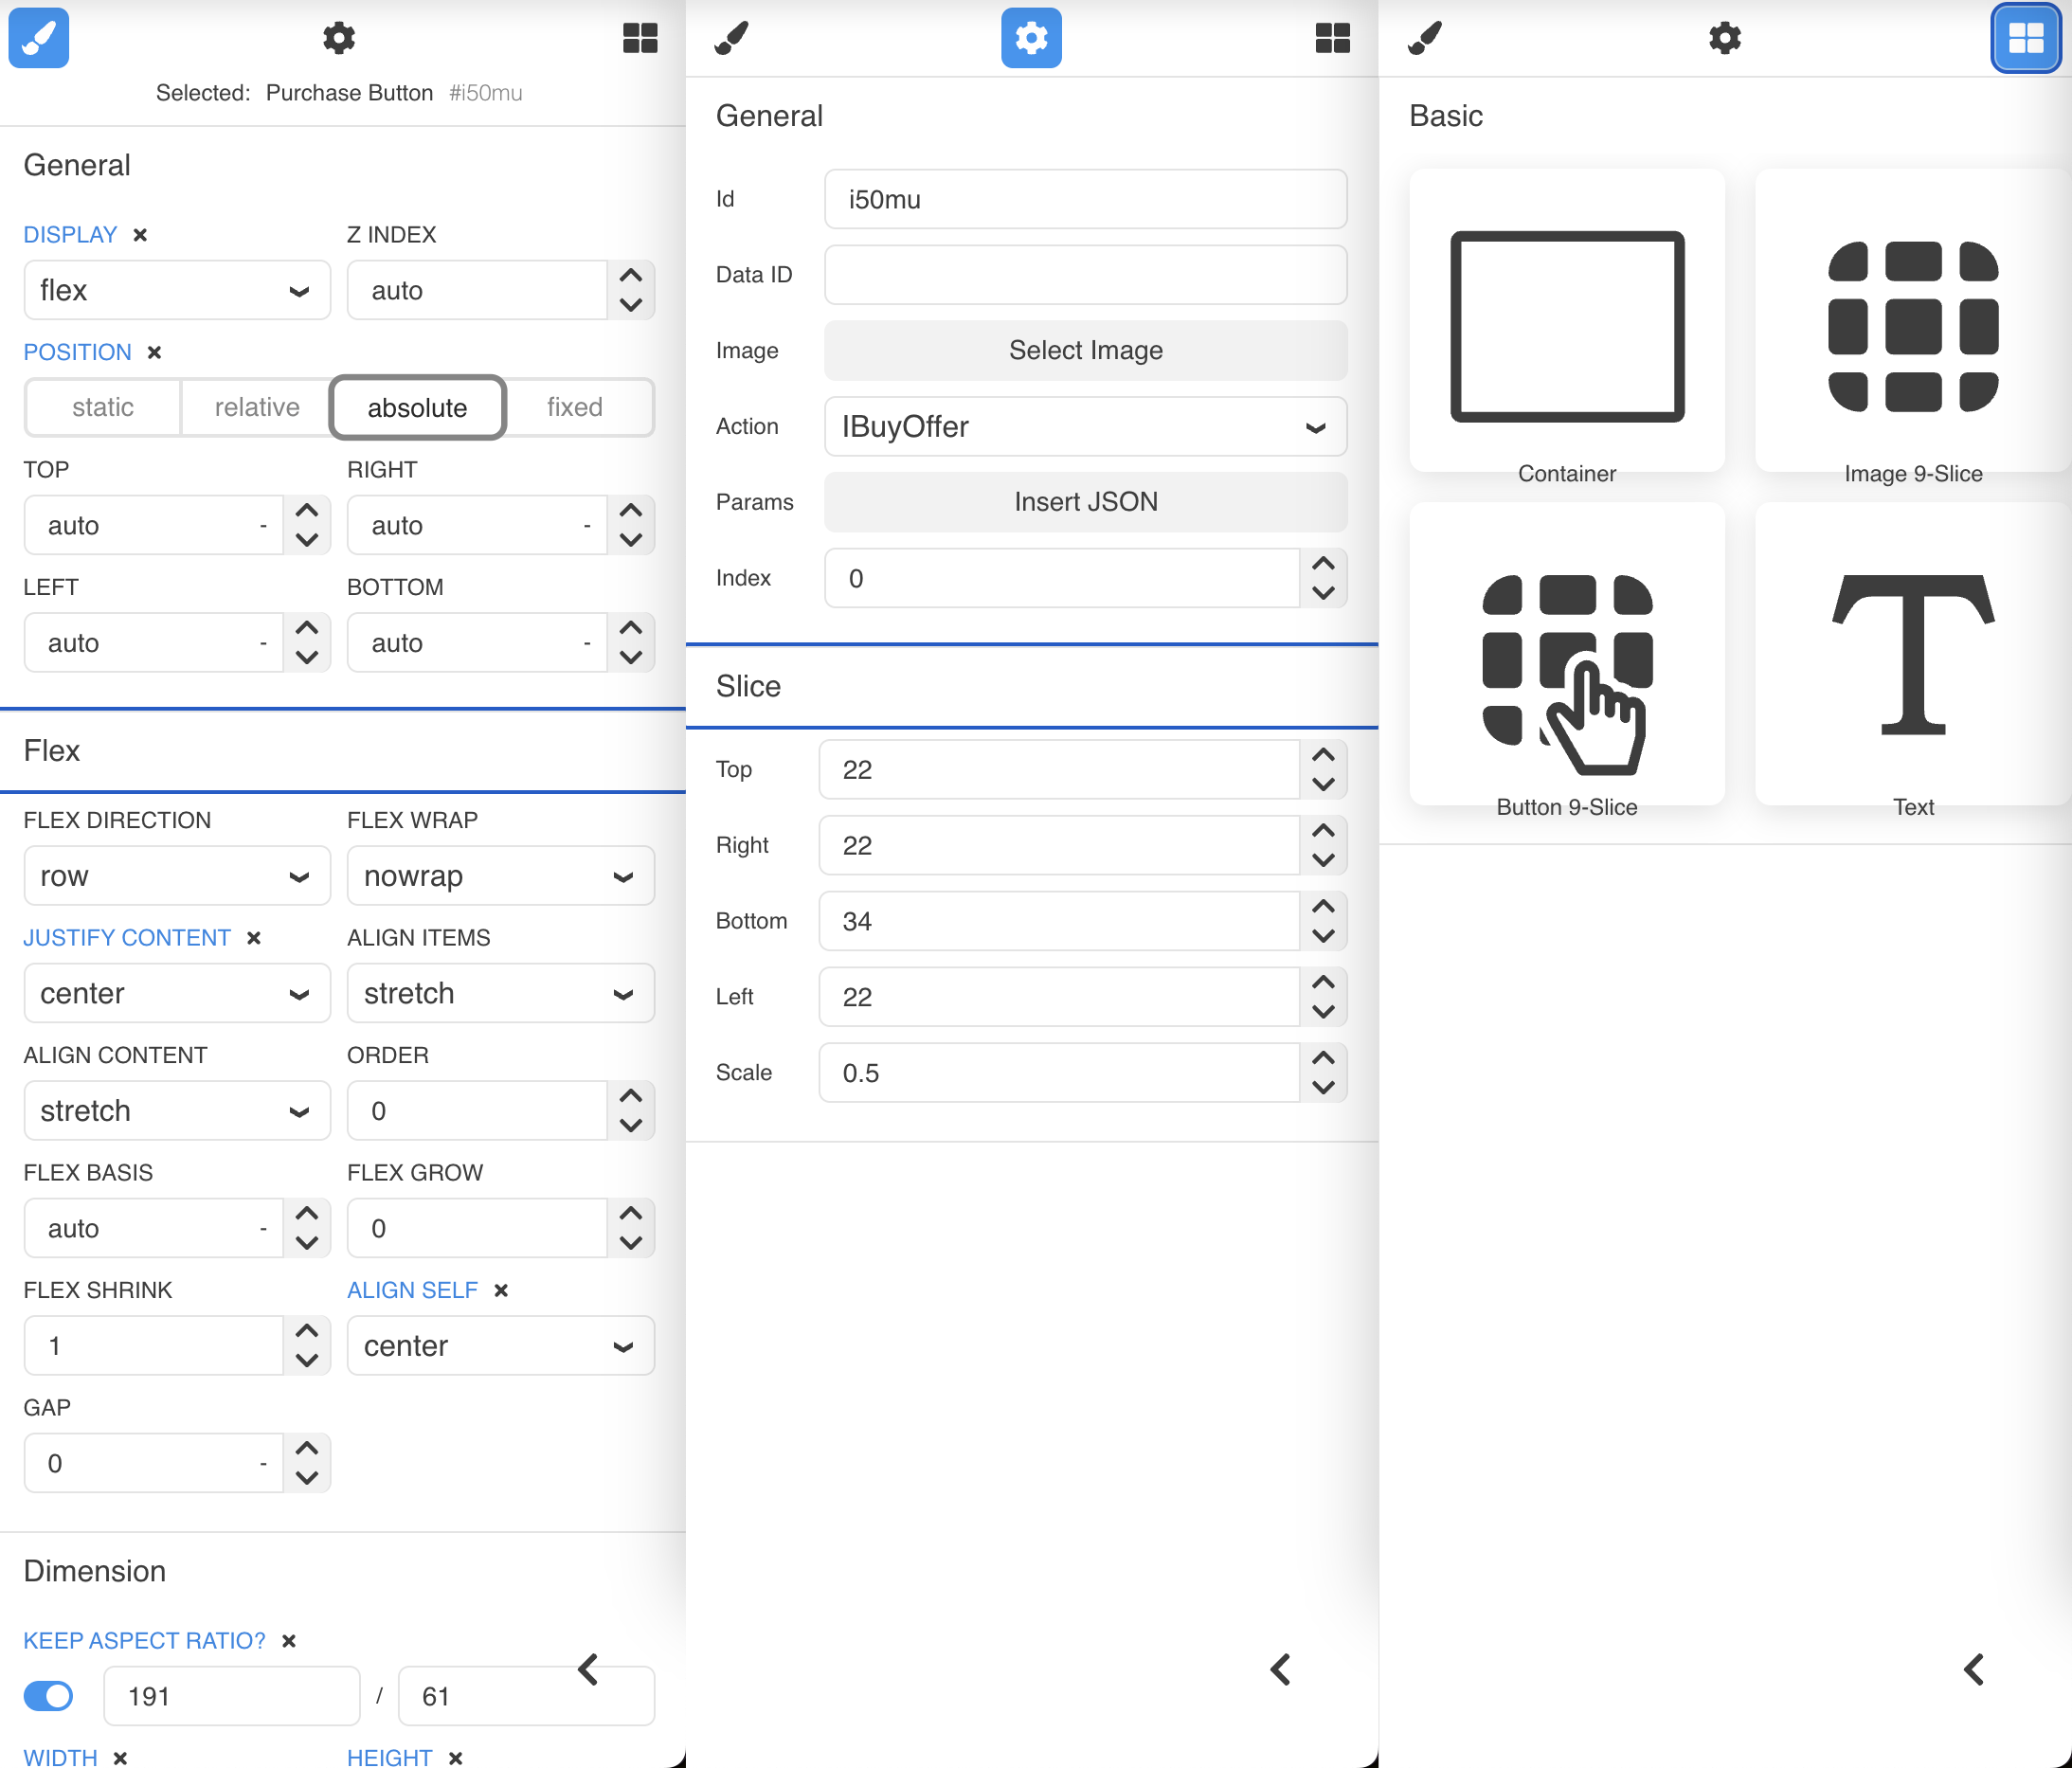
Style Tab
CSS styling controls for selected element:
- Position (absolute, relative, flex)
- Size (width, height, min/max)
- Layout (flexbox properties)
- Typography (font, size, color)
- Effects (opacity, shadows, transforms)
CSS Reference:
Settings Tab
Element-specific configuration:
- Image source selection
- Text source (localized key or dynamic)
- Button actions
- String formatting
- 9-slice mapping
- Script parameters (for component system)
Hierarchy Panel
Tree view showing all elements in your view:
- Drag-and-drop to rearrange
- Click to select elements
- Shows nesting structure
- Visual indication of hidden elements
Top Panel

From left to right:
- Device Selector: Choose screen aspect ratio (iPhone, iPad, etc.)
- Landscape Toggle: Switch between portrait/landscape
- Copy/Paste: Copy elements between views
- Play UI: Test in Demo App (see below)
- Save: Save your changes
- View Components: Show/hide element boundaries
- View Code: See generated HTML/CSS (read-only)
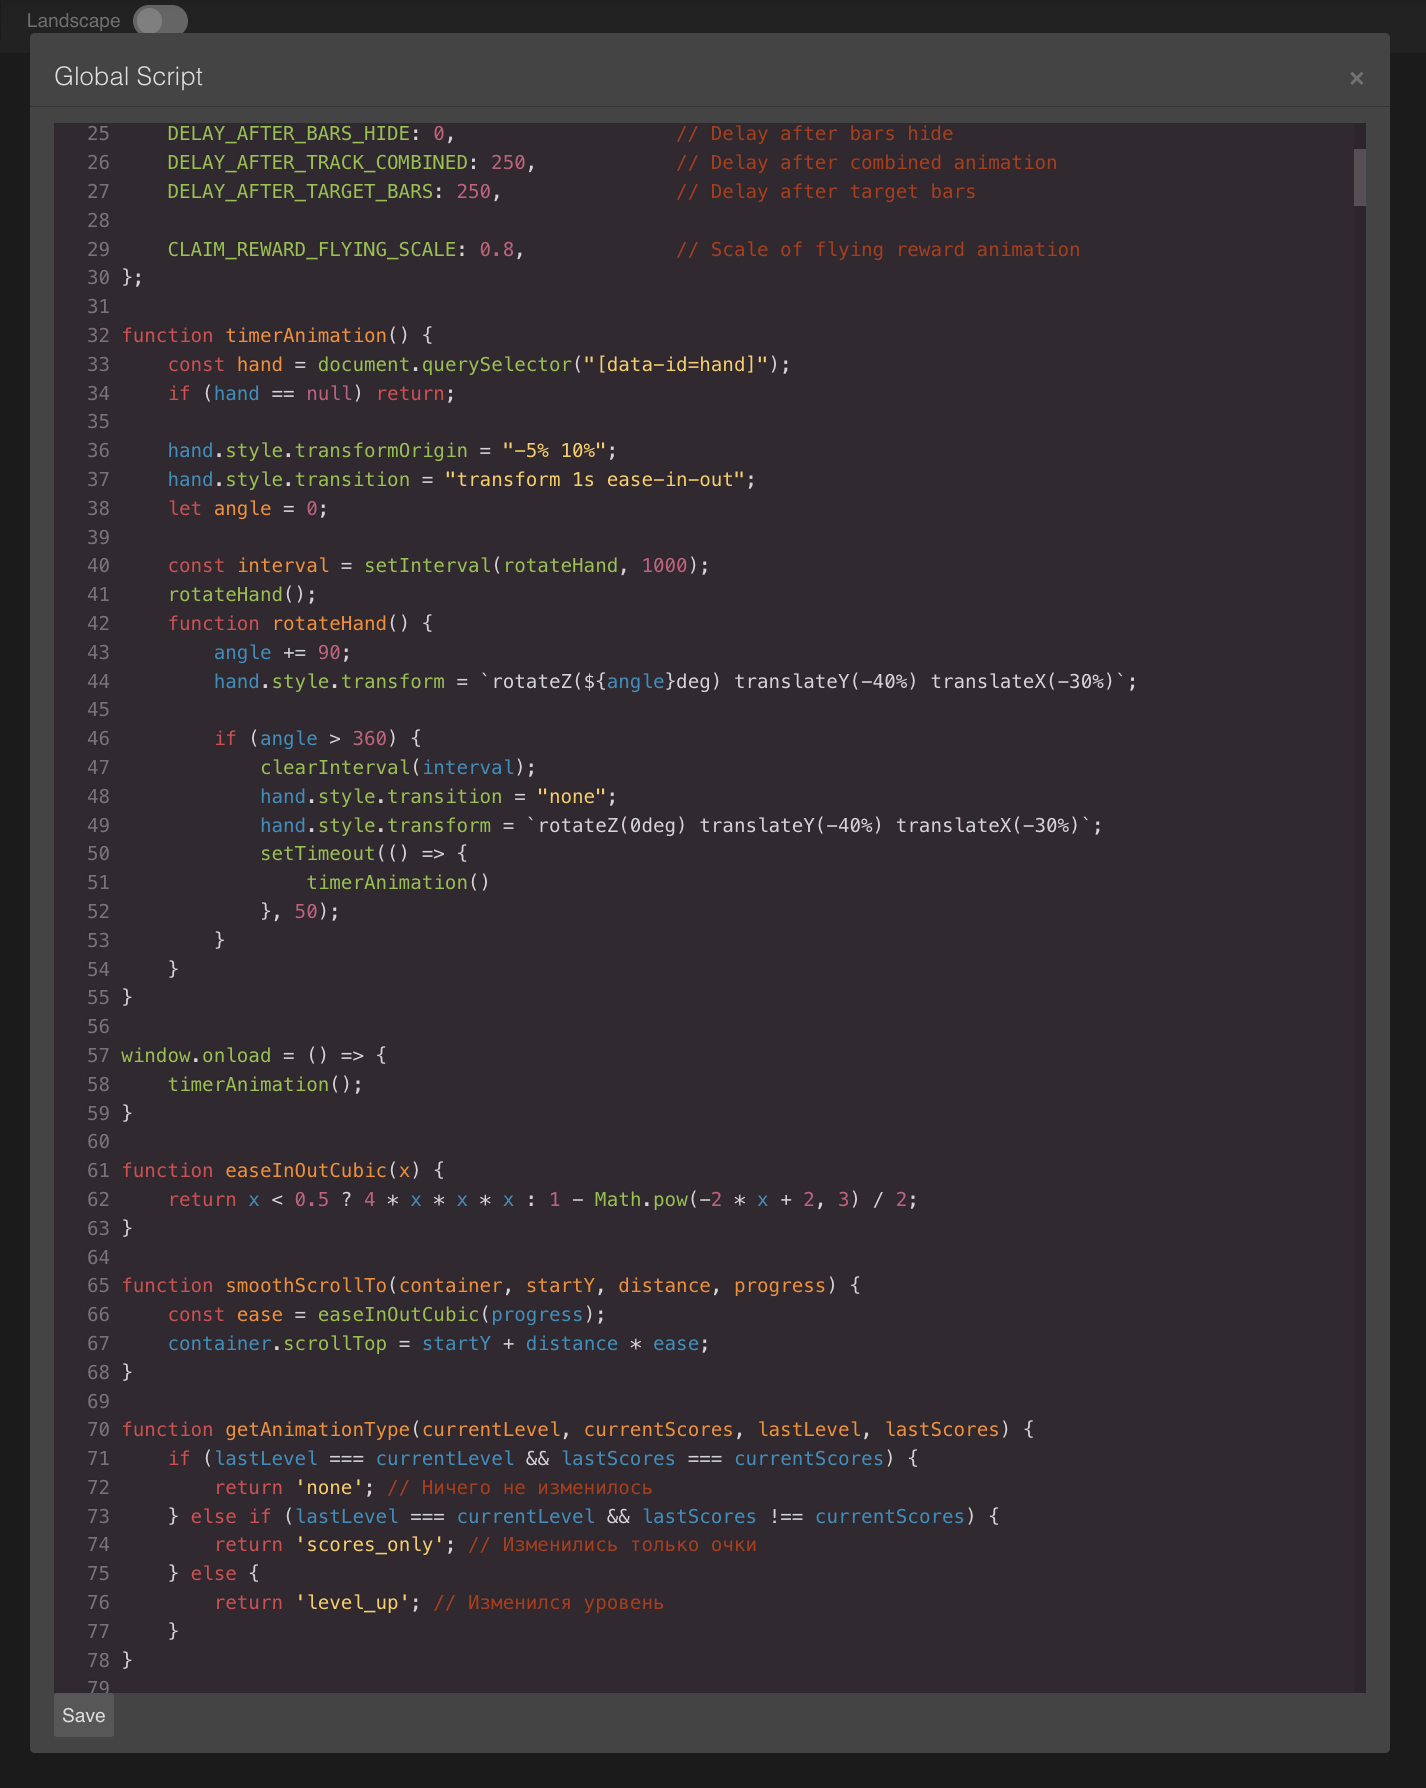
- Global Script Editor: Edit JavaScript (legacy - use components instead)
- Add Fonts: Manage custom fonts
Scripting Approaches
Balancy supports two ways to add JavaScript behavior:
Modern Approach: Component System (Recommended)
Attach small, focused script components to individual elements:
class HealthBar extends balancy.ElementBehaviour {
    // @serialize {number}
    maxHealth = 100;

    awake() {
        this.updateDisplay();
    }

    update(deltaTime) {
        // Update health bar
    }
}
Benefits:
- Reusable components
- Better organization
- Easier maintenance
- Designer-friendly
Learn More: Prefabs & Components
Legacy Approach: Global Script
Write all JavaScript in one global script:
When to use:
- Simple views with minimal logic
- Migration from old system
- Quick prototypes
When to avoid:
- Complex views
- Reusable UI elements
- Team collaboration
Working with Images
9-Slice Images
9-slice images scale without distortion, perfect for buttons and panels.
Setup:
- Upload image to Assets → Images
- Enable 9-slice in image settings:
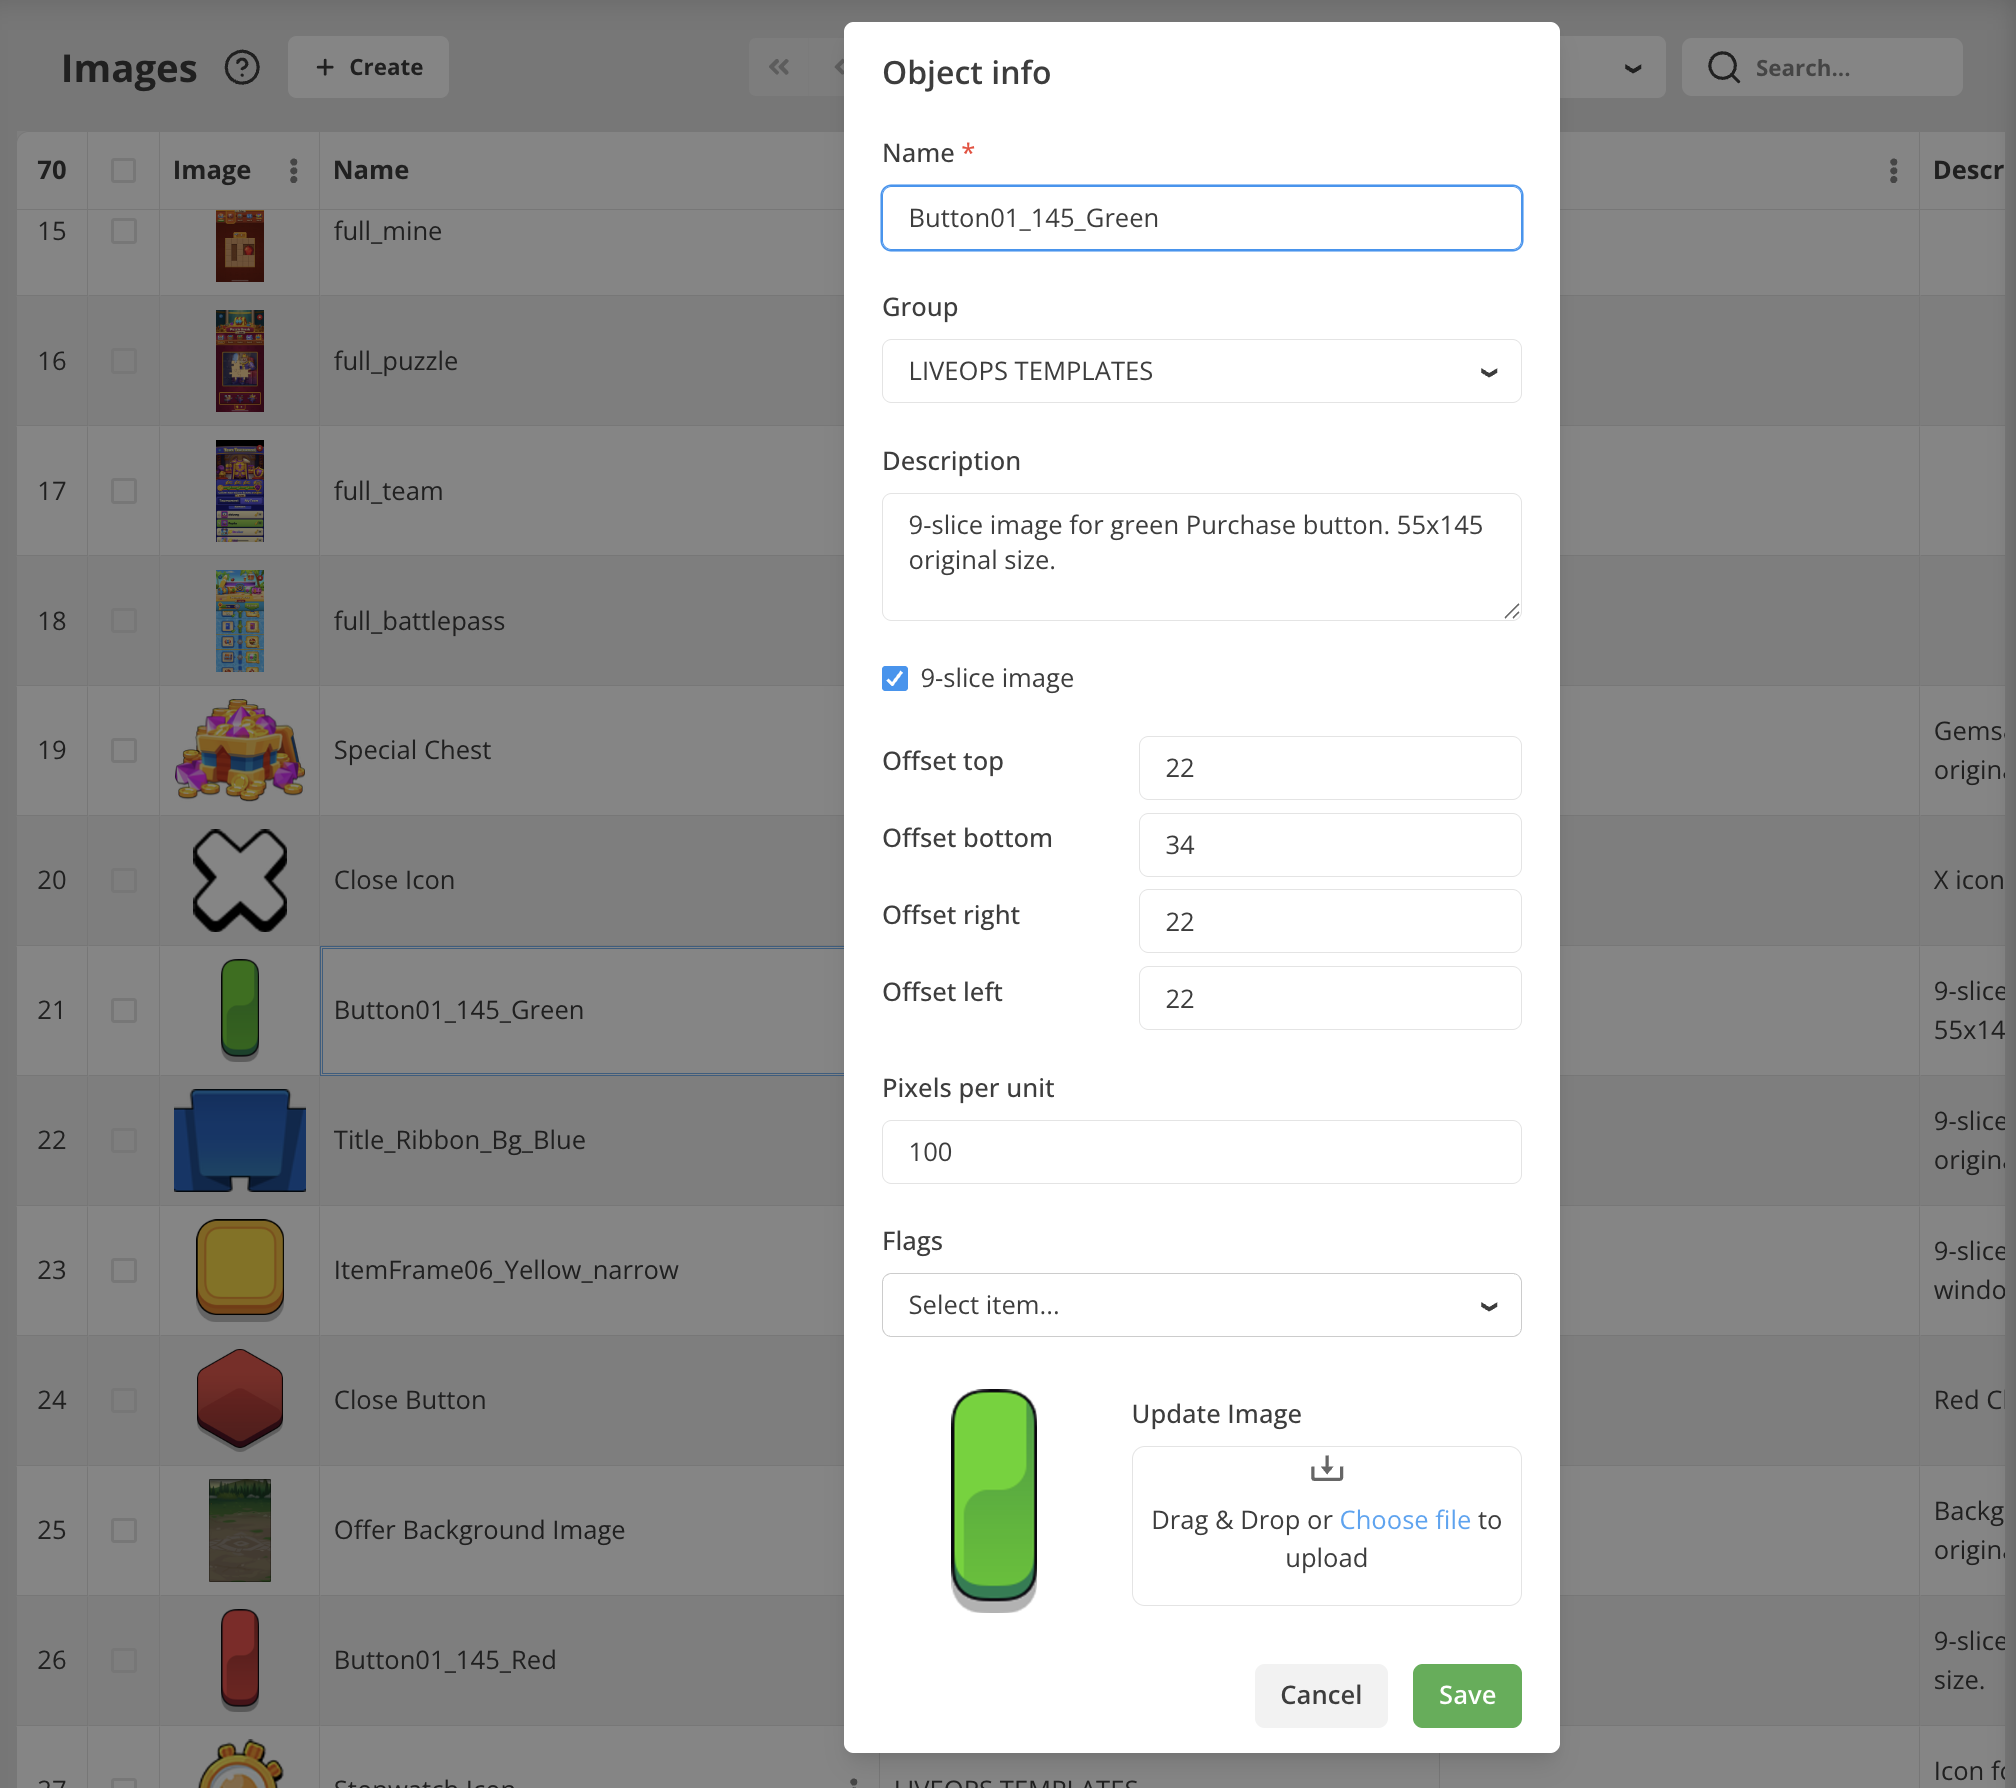
- Set slice margins (top, right, bottom, left)
- Use in UI Builder:
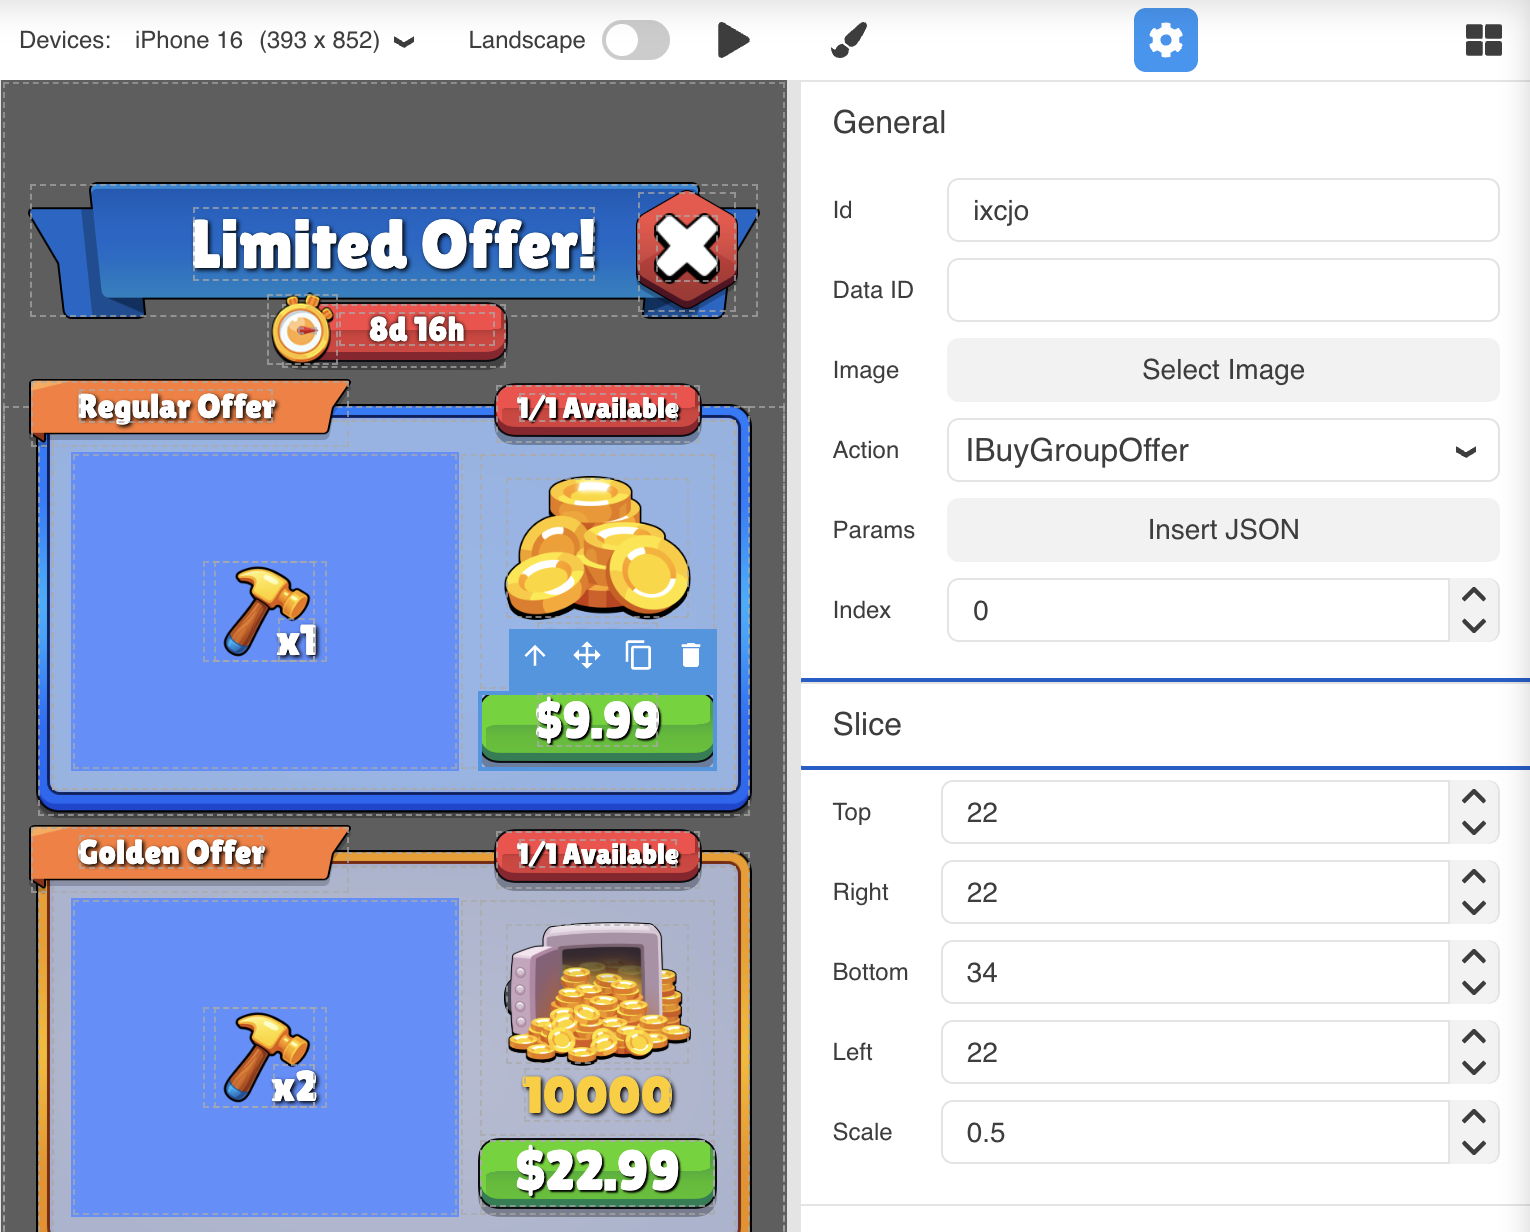
Using in Views:
<!-- 9-slice image element -->
<img data-image-id="123" slice-top="10" slice-right="10" slice-bottom="10" slice-left="10">

<!-- 9-slice button -->
<button data-image-id="123" slice-top="20" slice-right="20" slice-bottom="20" slice-left="20">
    Click Me
</button>
Working with Text
Static Text
Plain text content:
<div>Welcome to my game!</div>
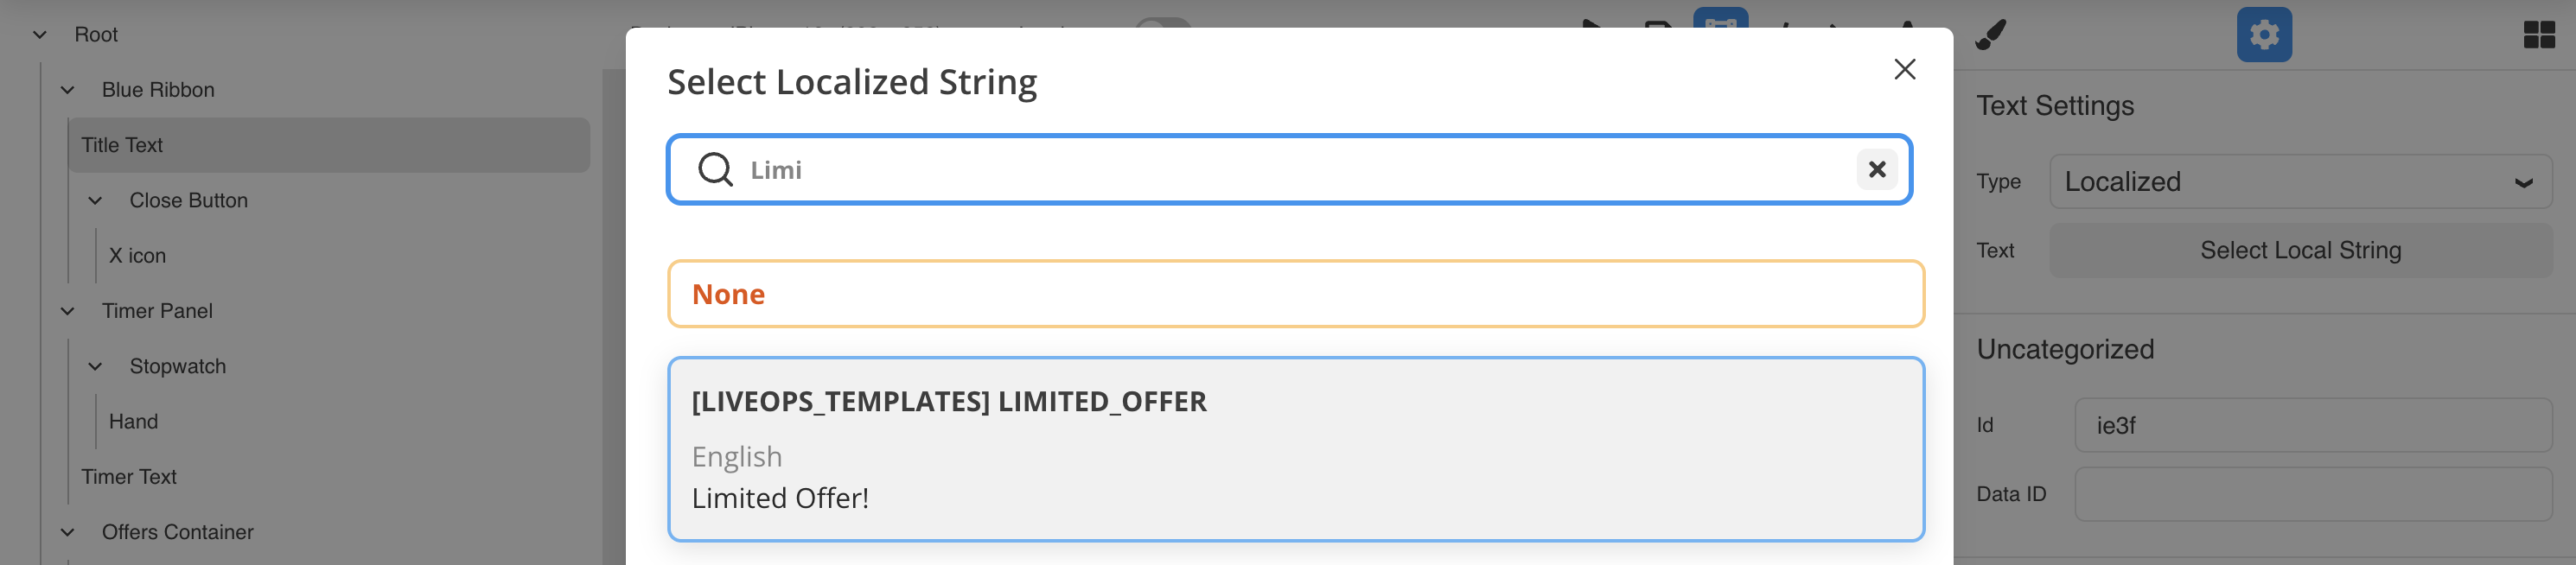
Localized Text
Text from Localization system:
- Create localized string in Localization section
- Add Text element to view
- In Settings tab, click Select Local String
- Choose your localization key

<!-- Automatically localized -->
<h1 data-text-type="localized" data-localization-key="welcome_title">
    Welcome
</h1>
Dynamic Text
Text that displays backend data:
<!-- Show offer price -->
<span data-text-type="dynamic"
      data-info-type="1"
      data-text-format="{price} USD">
</span>

<!-- Show time remaining -->
<span data-text-type="dynamic"
      data-info-type="3"
      data-text-format="Time left: {time}">
</span>
Learn More: Data Attributes
Previewing in Demo App
Test your views in real-time without deploying:
Steps:
- Set up Game Event with your view on Dashboard
- Open Demo App (click >> button in top right)
- Save your view changes
- Click Play UI button
- Open the entity (offer/event) in Demo App
Visual Indicator: When testing, you'll see "Overridden View: v1" at the bottom, indicating you're viewing the UI Builder version (not deployed version).
Version Number: The version increments each time you click Play UI during the session (v1, v2, v3...).
Best Practices
1. Use Responsive Design
Design for multiple screen sizes:
- Use percentage-based widths
- Test in different device aspect ratios
- Use flexbox for adaptive layouts
- Test both portrait and landscape
2. Organize Your Hierarchy
Keep elements organized:
- Use descriptive IDs (
player-info, notdiv1) - Group related elements in containers
- Keep hierarchy shallow (avoid deep nesting)
- Use consistent naming conventions
3. Leverage Prefabs
Create reusable components:
- Design once, use everywhere
- Easier to maintain
- Faster iteration
- Consistent design
Learn More: Prefabs & Components
4. Test Early and Often
Use Demo App frequently:
- Test after each major change
- Verify on different devices
- Check all interactive elements
- Test with real backend data
5. Use Components Over Global Scripts
For complex views:
- Attach script components to elements
- Keep scripts small and focused
- Reuse components across views
- Better performance and maintainability
Common Workflows
Creating a Buy Button
- Drag Button element to canvas
- Select 9-slice image
- Add BuyButton script component
- Configure price parameters
- Set up click callback
Learn More: Built-in Scripts
Creating a Shop
- Create container for shop pages
- Add Shop script component
- Configure page prefabs
- Set display mode (scroll vs tabs)
- Connect to shop data
Learn More: Templates
Creating an Offer View
- Design layout (image, title, description, timer)
- Add reward items container
- Add GameOffer script component
- Configure element references
- Connect to offer data
Learn More: Templates
Keyboard Shortcuts
- Ctrl/Cmd + F: Find in Script Editor
- Ctrl/Cmd + H: Replace in Script Editor
- Ctrl/Cmd + S: Save view
- Ctrl/Cmd + C: Copy selected element
- Ctrl/Cmd + V: Paste element
Troubleshooting
Elements Not Showing
Problem: Added element but it's invisible.
Solutions:
- Check element has width/height
- Verify not outside canvas bounds
- Check parent container overflow settings
- Look for
display: nonein styles
Images Not Loading
Problem: Image element shows broken icon.
Solutions:
- Verify image was uploaded to Assets
- Check image ID is correct
- Ensure image has proper permissions
- Clear browser cache and reload
Scripts Not Running
Problem: JavaScript not executing.
Solutions:
- Check for syntax errors (red underlines)
- Open browser console for error messages
- Verify script component is properly attached
- Ensure
balancy.ElementsManager.initialize()was called
Demo App Not Updating
Problem: Demo App shows old version.
Solutions:
- Click Save before Play UI
- Check "Overridden View" indicator appears
- Refresh Demo App page
- Verify Game Event is properly configured
Next Steps
- Learn the Component System for reusable UI
- Explore Built-in Scripts for common patterns
- Check Balancy API for JavaScript methods
- See Templates for ready-to-use examples